How to install GeoServer with Apache Tomcat 9 on Linux Ubuntu?

GeoServer is an open-source java-based GIS server. GeoServer publishes geospatial data in an open standards format set forth by the Open Geospatial Consortium (OGC).
There are many ways to install GeoServer in Ubuntu Linux. GeoServer provides Linux binary and a stand-alone web archive packaged for use with existing application servers such as Apache Tomcat and Jetty. In this tutorial, I will show you how to install GeoServer with Apache Tomcat 9 on Linux based operating system.
Step – 01: Update package manager repositories
Update the package manager repositories on your Linux operating system by typing the below command on the terminal.
sudo apt update
sudo apt upgrade
Step - 02: Install Java Run Time Environment (JRE)
GeoServer is written in Java. It requires a Java 8 or Java 11 environment (JRE) to be installed on your system. For this purpose, We will install Java Development Kit (OpenJDK).
sudo apt install default-jdkAfter successfully installed, check the java version by typing the below command -
java --versionThe output should look similar to this -
openjdk version "1.8.0_312"
OpenJDK Runtime Environment (build 1.8.0_312-8u312-b07-0ubuntu1~20.04-b07)
OpenJDK 64-Bit Server VM (build 25.312-b07, mixed mode)
Apache Tomcat is an open-source web server and servlet container that is used to serve Java applications.
Before installing Tomcat, we will create a user called tomcat and assign it to the tomcat server for security issues.
sudo useradd -m -d /opt/tomcat -U -s /bin/false tomcatTo install Tomcat, we need to download the latest version of tomcat 9 .tar.gz Linux distribution file from the download page.
Note: The latest version of GeoServer is incompatible with Apache Tomcat 10.
First, we create a folder called tmp where we download this file.
mkdir /tmpNow, navigate to the tmp folder and here, we will download the tomcat tar archive file using the wget command.
cd /tmpOpen your browser and visit https://tomcat.apache.org/ and navigate to the tomcat 9 download page. Right click on the tar.gz and copy the link address.

Now, in the terminal type, wget and paste the copied link.
wget https://dlcdn.apache.org/tomcat/tomcat-9/v9.0.64/bin/apache-tomcat-9.0.64.tar.gz // Replace the download link addressDownloading the file from the hosted server will take a few minutes.
After that, we will extract this archive file by running the following command.
sudo tar xzvf apache-tomcat-9.0.64.tar.gz -C /opt/tomcat --strip-components=1It will extract this tar file in the /opt/tomcat directory.
Since we have already created a user tomcat, we can now grant our user tomcat to ownership over the extracted installation by running:
sudo chown -R tomcat:tomcat /opt/tomcat/
sudo chmod -R u+x /opt/tomcat/bin
We have successfully installed the JDK and Tomcat. We also created a separated user for tomcat and setup permission over tomcat installation. Now, we will configure credentials for our admin and user in order to access and mange apps inside tomcat.
Step - 04: Configuring Admin Users
In this step, we will define privileged users in Tomcat’s configuration to access the Manager and Host Manager. Here, we can define an IP address that provides access to the tomcat admin page and disallow other IP addresses to access this page for security purposes.
You can find the user configuration file in tomcat-users.xml. In our case, this file is located in /opt/tomcat/conf/tomcat-users.xml. Open the file for editing with the following command:
sudo nano /opt/tomcat/conf/tomcat-users.xmlWe will add the following lines before the ending tag:
<role rolename="manager-gui" />
<user username="manager" password="manager_password" roles="manager-gui" />

<role rolename="admin-gui" />
<user username="admin" password="admin_password" roles="manager-gui,admin-gui" />
You see, there have password options highlighted. We need to replace these highlighted passwords with our own. When you’re done, save and close the file.
Here, we define two user roles, manager-GUI, and admin-GUI, which allow access to the Manager and Host Manager pages, respectively. We also define two users, manager and admin, with relevant roles.
By default, Tomcat is configured to restrict access to the admin pages unless the connection comes from the server itself. To access those pages with the users we just defined, we will need to edit config files for those pages.
To remove the restriction for the Manager page, open its config file for editing:
sudo nano /opt/tomcat/webapps/manager/META-INF/context.xmlWe need to comment out the Valve definition, as shown:
opt/tomcat/webapps/manager/META-INF/context.xml
...
<Context antiResourceLocking="false" privileged="true" >
  <CookieProcessor className="org.apache.tomcat.util.http.Rfc6265CookieProcessor"
                   sameSiteCookies="strict" />
<!--  <Valve className="org.apache.catalina.valves.RemoteAddrValve"
         allow="127\.\d+\.\d+\.\d+|::1|0:0:0:0:0:0:0:1" /> -->
  <Manager sessionAttributeValueClassNameFilter="java\.lang\.(?:Boolean|Integer|Long|Number|String)|org\.apache\.catalina\.filters\.Csr>
</Context>
After editing, we need to save and close the file. We also need to repeat it for the Host Manager too. So, open the context file by running the following command and comment out the valve section.
sudo nano /opt/tomcat/webapps/host-manager/META-INF/context.xmlWe have now defined two users, admin, and manager, which we will later use to access restricted parts of the management interface.
Now, it’s time to create a systemd service for our Tomcat server. Let’s do it.
Step - 05: Creating a systemd service
Systemd is a software suite for Linux that provides a standard process for controlling what programs run when a Linux system boots up. Systemd unifies service configuration and behavior across Linux distributions.
In this step, we will create a systemd service for our Tomcat server that quietly run tomcat in the background. It will also help us to restart Tomcat automatically in case of an error or failure or reboot/restart the server.
Tomcat itself is a java based web server that requires Java runtime to run it. We already installed the java from the JDK in the above step. We need to specify the java path in our tomcat systemd service configurations. The following command will show the java installation path.
sudo update-java-alternatives -lThe output should look like similar to this:
java-1.11.0-openjdk-amd64 1111 /usr/lib/jvm/java-1.11.0-openjdk-amd64Here, “/usr/lib/jvm/java-1.11.0-openjdk-amd64” is our java installation path that is needed to define the service.
Step - 06: Create a Service File for Tomcat
Now, we will create a tomcat service called tomcat.service under /etc/systemd/system. Run the below command to edit this file.
sudo nano /etc/systemd/system/tomcat.serviceCopy and paste the below codes into the tomcat.service.
[Unit]
Description=Tomcat
After=network.target

[Service]
Type=forking

User=tomcat
Group=tomcat

Environment="JAVA_HOME=/usr/lib/jvm/java-1.11.0-openjdk-amd64"
Environment="JAVA_OPTS=-Djava.security.egd=file:///dev/urandom"
Environment="CATALINA_BASE=/opt/tomcat"
Environment="CATALINA_HOME=/opt/tomcat"
Environment="CATALINA_PID=/opt/tomcat/temp/tomcat.pid"
Environment="CATALINA_OPTS=-Xms512M -Xmx1024M -server -XX:+UseParallelGC"

ExecStart=/opt/tomcat/bin/startup.sh
ExecStop=/opt/tomcat/bin/shutdown.sh

RestartSec=10
Restart=always

[Install]
WantedBy=multi-user.target
Here, you need to modify the highlighted path of JAVA_HOME based on your java installation path.
We define a service that will run Tomcat by executing the startup and shutdown scripts it provides. We also set a few environment variables to define its home directory (which is /opt/tomcat in our case) and limit the amount of memory that the Java VM can allocate (in CATALINA_OPTS). Upon failure, the Tomcat service will restart automatically.
After editing, save and close the file.
Reload the systemd daemon so that it becomes aware of the new service by running this command.
sudo systemctl daemon-reloadNow, we enable our tomcat service by typing:
sudo systemctl enable tomcatThen, start the Tomcat service by typing:
sudo systemctl start tomcatWe have done all. Now, we will check the status of Tomcat, weather it’s running or not by typing this below command.
sudo systemctl status tomcat
● tomcat.service - Tomcat
     Loaded: loaded (/etc/systemd/system/tomcat.service; enabled; vendor preset: enabled)
     Active: active (running) since Wed 2022-06-29 16:01:50 +06; 58min ago
    Process: 125471 ExecStart=/opt/tomcat/bin/startup.sh (code=exited, status=0/SUCCESS)
   Main PID: 125478 (java)
      Tasks: 36 (limit: 18759)
     Memory: 242.5M
     CGroup: /system.slice/tomcat.service
             └─125478 /usr/lib/jvm/java-1.11.0-openjdk-amd64/bin/java -Djava.util.logging.config.file=/opt/tomcat/>
Press q to exit the command.
We see the status shows our tomcat service is now active and running. The tomcat service and vendor present is also enabled, so we can now access Tomcat through our web browser.
Step - 07: Accessing the Web Interface
Tomcat is running successfully. Now, it’s time to configure the firewall to access tomcat in our web browser. By default, tomcat use the 8080 port to accept HTTP requests. We can change this port in the web.xml file. We need to allow this port to connect to tomcat running in the background.
Run the following command to allow traffic in this port.
sudo ufw allow 8080If you use a Linux desktop, you can access tomcat by localhost or 127.0.0.1, and if you installed tomcat, you could access the web interface via the IP address of your server. Let’s check it.
http://127.0.0.1:8080/
http://<your_server_IP_address>:8080
Congratulations!! You’ll see the default Tomcat welcome page that looks like this below -
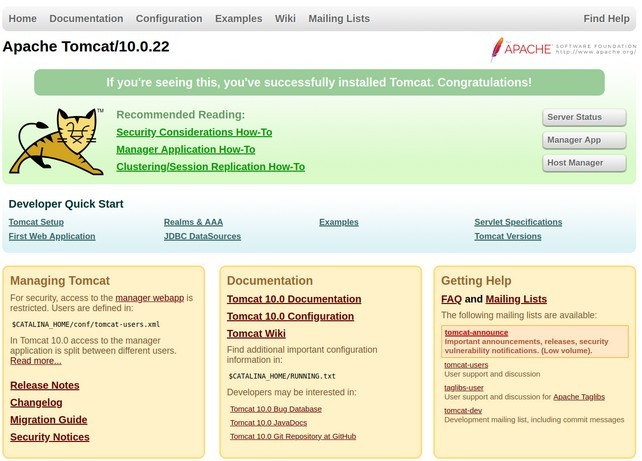
Step – 08: Download and Install GeoServer (geoserver.war)
To install GeoServer in Apache Tomcat, we need to download GeoServer .war file. So, visit https://geoserver.org/ and then navigate to the download page https://geoserver.org/download/. GeoServer has two versions one is Stable, and another is Maintenance. The stable version is the latest one. The maintenance one is the earlier release version which is now maintained and officially supported for a specific time. Here, we will choose the stable version for this installation. Click on it, and it will be redirected to the https://geoserver.org/release/stable/ page.
Right-click on the Web Archive under the Packages and copy the link. Now, open your linux terminal and navigate to the tmp folder by typing cd /tmp. In this directory, we will download the geoservar.war file using wget. In your terminal, type wget and paste the link you copied.
wget https://sourceforge.net/projects/geoserver/files/GeoServer/2.21.0/geoserver-2.21.0-war.zipNow. Unzip the downloaded file to the tomcat webapps directory by following the below command -
sudo unzip geoserver-2.21.0-war.zip -C /opt/tomcat/webappsWe have successfully completed the installation process. Open your browser and type http://127.0.0.1:8080/geoserver. You will see the GeoServer welcome page. By default, GeoServer used username as admin and password as GeoServer. You can access the GeoServer admin panel to work further with these credentials.
Share To
About Author
- Kamal Hosen
Geospatial Developer | Data Science | PythonA passionate geospatial developer and analyst whose core interest is developing geospatial products/services to support the decision-making process in climate change and disaster risk reduction, spatial planning process, natural resources management, and land management sectors. I love learning and working with open source technologies like Python, Django, LeafletJS, PostGIS, GeoServer, and Google Earth Engine.